9 December 2020
Archicad Plugin Installation Guide

Prerequisites :
You need to have an Archireport account to connect Archicad to. If you don’t yet have account, you can test it for free for 30 days by simply creating a user account on this page.
Steps for installing and using the plugin :
An Archicad plugin is a file with an .apx extension, for example ArchiReport_ac24.apx. It can sometimes include other files or folders, as it does in this case. Here is how to install the Archireport add-on in Archicad :
- Install the plugin
– Download the plugin archive for your version of Archicad from the Download page
– Unzip the archive you have downloaded and save the contents of it:On Mac: Place both files in the folder Applications/GRAPHISOFT/ARCHICAD 23-24/Add-Ons/Archireport (you will need to create this Archireport folder)On Windows PC: Place all the contents of the archive in a folder C:/Program Files/Graphisoft/Archicad 23-24/Add-Ons/Archireport (you will need to create this Archireport folder). - Add the Add-On
– Open up Archicad
– Go to the Options menu > Add-On Manager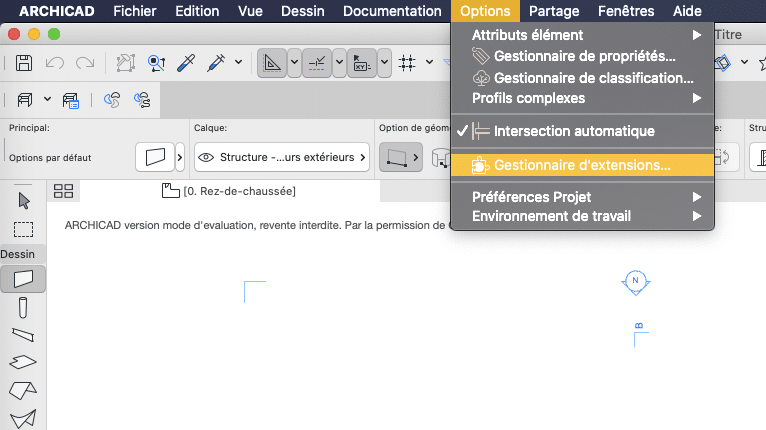
– In the Add-On Manager popup window, click on the Add… button
– On Mac: Select “All Add-Ons” for the menu Activate
– On Windows: Select the type “All Add-Ons”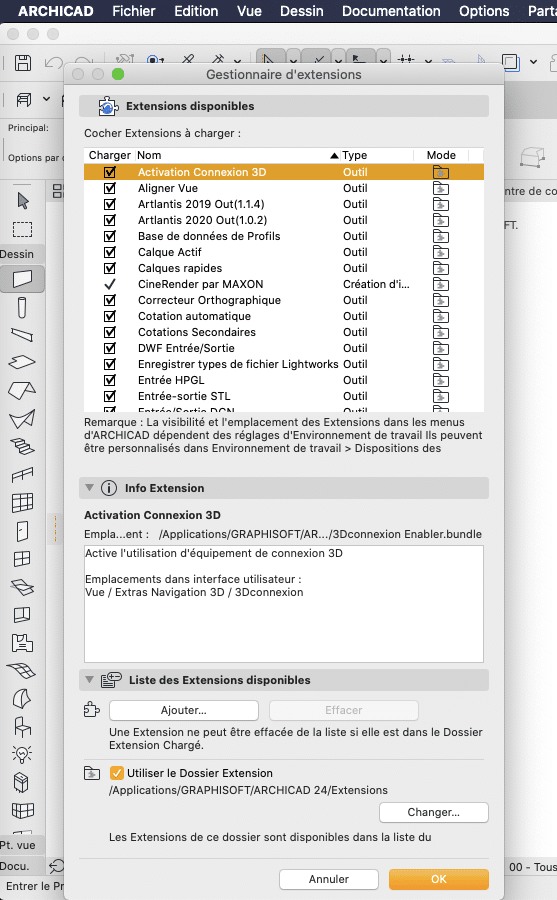
– A file search window will open. Locate the extension (the file with the .apx extension, for example ArchiReport_ac24.apx)
– You may need to uncheck the “Hide loaded Extensions palette” box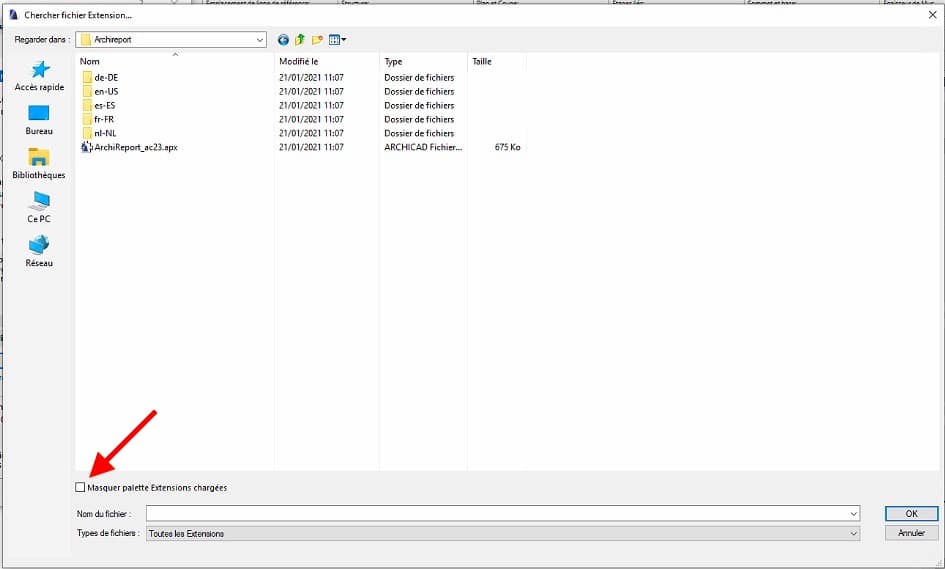
– Click on OK.
– The add-on will appear in the Add-On Manager.To the left of it, you should see a tick as shown in the figure above.If there is a triangle with an exclamation mark, then you need to check the versions of Archicad and the plugin you downloaded. You may have selected a different version.Contact our tech support if you have any problems. - Connect Archicad to Archireport
– Select the Archicad project of your choice
– Go to the File menu > Interoperability and select Send to Archireport…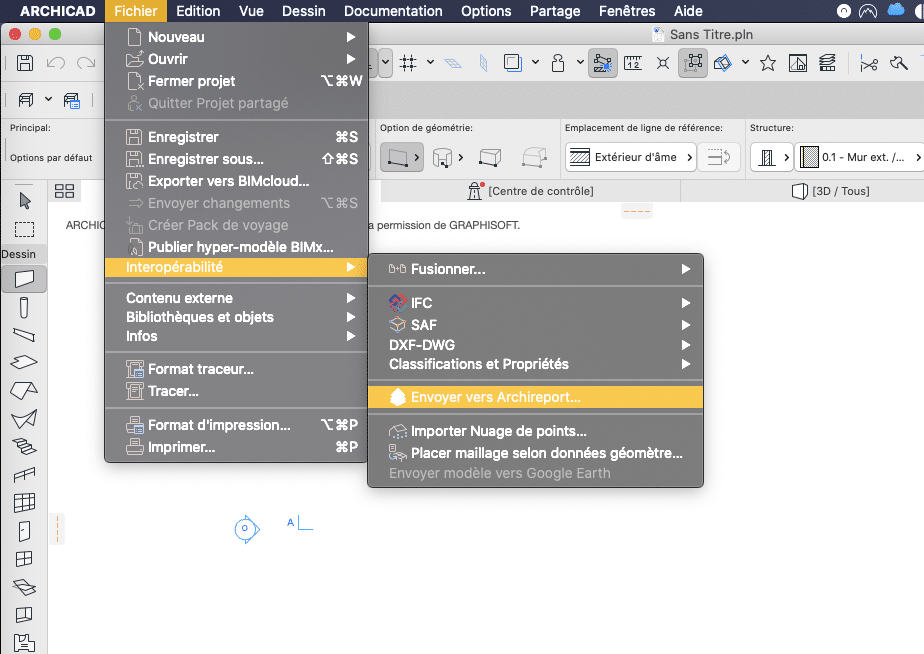
– Connect to Archireport: Tap on the login button at the top right of the window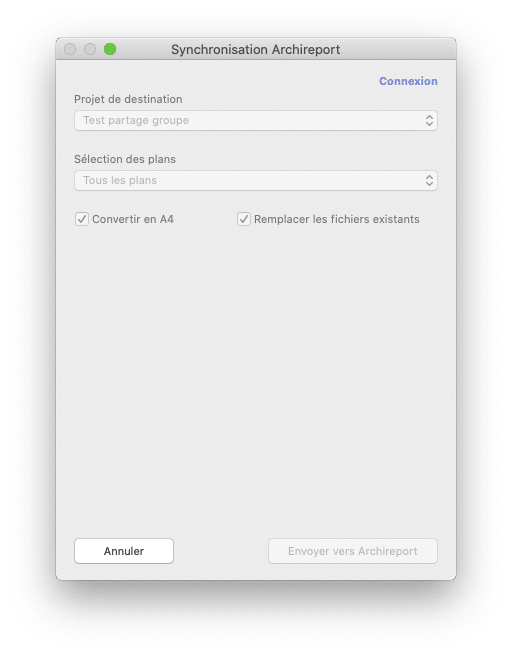
– To activate the connection between Archicad and Archireport, you need to log in with your Archireport user details.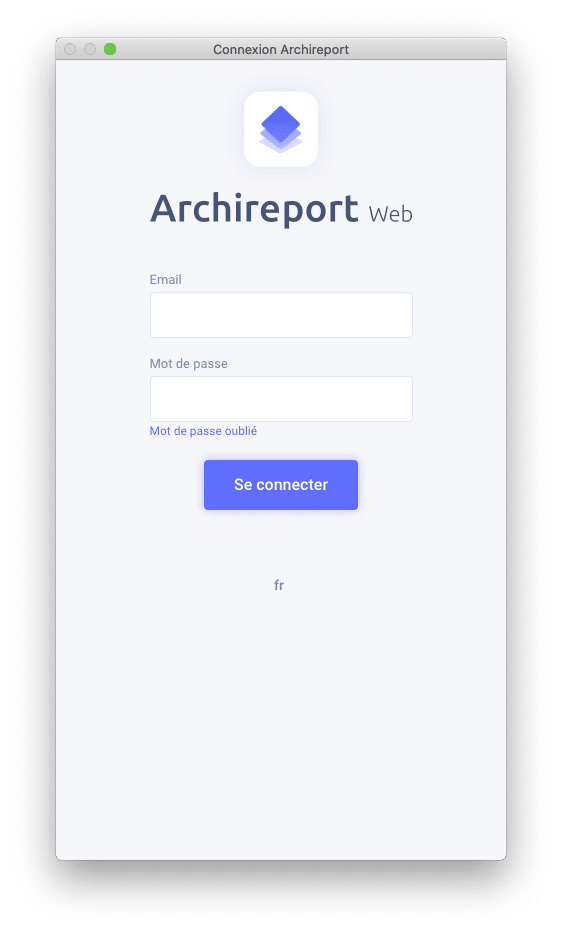
– Authorize communication between the two applications.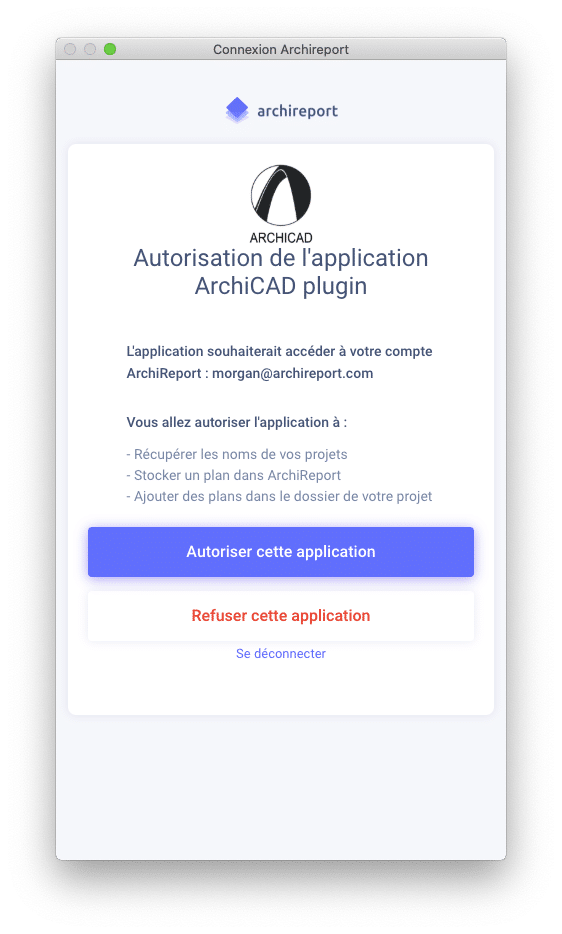
- Send your plans to Archireport
– Select the Archireport project you want to send your plans to from the drop-down menu. Select the plans and views you want to export. The PDF files will be sent to the Documents > Plans folder of your Archireport project.The A4 conversion option is selected as a default setting to optimize transfer speed and document size.
The “Replace existing files” option allows files to be overwritten when updating your plans.
Finally, click on “Send to Archireport”.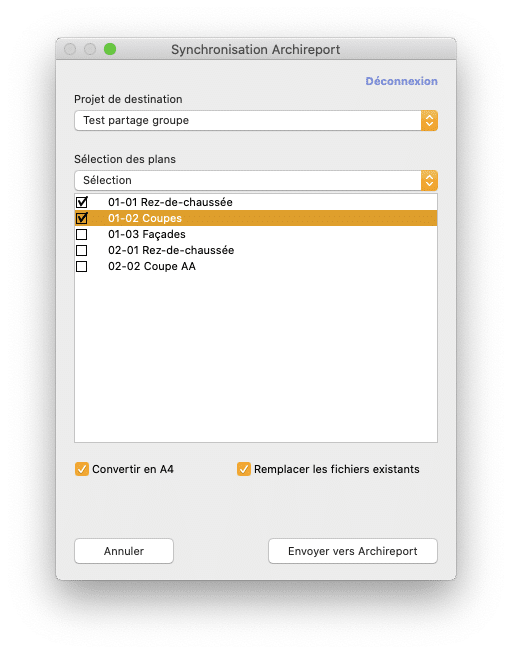
– Once all the files have been transferred, close the window by clicking on the “Close” button in the bottom right corner.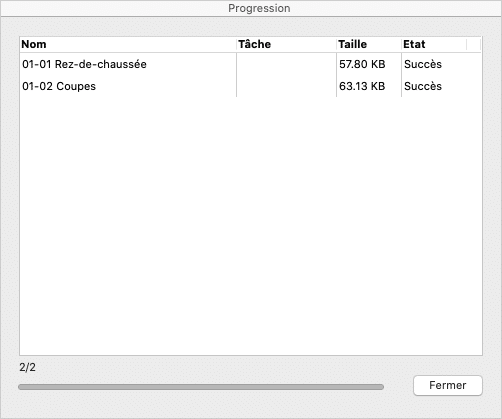
- View your plans in Archireport
Once the transfer has been completed, go into your Archireport account to see the plans in the Plans folder of the project selected.On the internet (https://web.archireport.com), you will be able to access your plans immediately.
On iOS, you will need to sync the application for the files to show up in your project on an iPad or iPhone.
And also…
We’ve just released an Archireport plugin for Google Sketchup!
To find out more
Pour toute demande commerciale ou technique, notre équipe basée à Rennes est joignable :
- using our contact form on https://www.archireport.com/contact/
- by e-mail at contact@archireport.com
- by telephone on +33 (0)2 90 38 04 48

